Creating Custom Native Integrations
In most cases, you will probably be able to do everything you need with the official plugins, and if not likely you can find a community plugin that will cover what you need.
But not in every case, and knowing how to take matters into your own hands and write your own custom native integrations gives you a lot more power to work with. It can also keep you from getting blocked - say if a community plugin you are relying on doesn’t work anymore.
There are three main ways you can integrate custom native code:
- If it does not need to be accessible to the web view, then you can just make whatever change you want directly to the native iOS/Android project
- If it does need to be accessible, you can add custom native code and expose it to the web view as a local plugin
- You can do the same as above, except create a publishable/installable plugin just like the other community Capacitor plugins that are available.
Creating your own local plugin
Let’s take a look at an example of integrating our own native code to a project, and then integrating that into our application running inside of the web view. We aren’t going to get too far into the weeds here - this module is only intended to be introductory. But, I do want to give you a realistic view of what this might look like.
The example we are going to look at is displaying a native alert to the user. I don’t think there is any particularly strong reason to do this, you could just use something like an Ionic web based alert, but if you are not using Ionic or you would just prefer to use native controls where possible this is certainly something you could do.
We will take a look at adding the custom native code for iOS and Android.
NOTE: Make sure to run the ionic cap sync or npx cap sync commands before attempting to open the native projects.
Adding Native Code for iOS
First, you will need to open Xcode:
npx cap open iosor
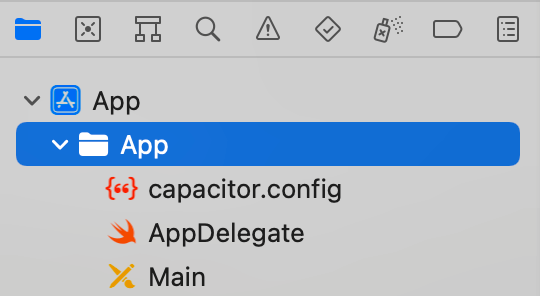
ionic cap open iosWithin XCode, you will need to expand App on the right, and then select the App target within that:

You can then right click it to create a new file - you should choose a Swift file and name it something like AlertPlugin.swift. You could then add the following code to the file:
import Foundation
import Capacitor
@objc(AlertPlugin)
public class AlertPlugin: CAPPlugin {
    @objc func present(_ call: CAPPluginCall) {
        let message = call.getString("message") ?? ""
        let alertController = UIAlertController(title: "Alert", message: message, preferredStyle: .alert)
        alertController.addAction(UIAlertAction(title: "Ok", style: .default))
        DispatchQueue.main.async {
          self.bridge.viewController.present(alertController, animated: true, completion: nil)
        }
    }
}
This is iOS/Swift native code, so of course if you are not familiar with that it is going to be hard to understand. It is still going to be possible to do some simple native stuff even if you don’t know Swift/Kotlin just by copying and pasting simple examples from Googling. But, likely anything that is a bit more complicated will be hard to achieve without learning the language a little.
The specifics here aren’t too important for now, let’s just focus on:
import Capacitor
@objc(AlertPlugin)
public class AlertPlugin: CAPPlugin {
    @objc func present(_ call: CAPPluginCall) {
        // ...snip
    }
}
We are creating a CAPPlugin and labelling it with @objc(AlertPlugin) which is how Capacitor will be able to find it and expose it to our application in the web view. We have created a single function for this plugin called present which we will use to display the native alert. The rest of the code is just standard Swift code for displaying an alert:
let message = call.getString("message") ?? ""
let alertController = UIAlertController(title: "Alert", message: message, preferredStyle: .alert)
alertController.addAction(UIAlertAction(title: "Ok", style: .default))
DispatchQueue.main.async {
    self.bridge.viewController.present(alertController, animated: true, completion: nil)
}
As I just mentioned, with some basic knowledge of setting up a Capacitor plugin, and by Googling iOS examples, it isn’t too unreasonable to put something like the above together even if you don’t know Swift.
The next thing we need to do is register the plugin. You will need to create another new file just like you did for the Swift file we created, but this time:


