Existing member? Log in and continue learning

See if you like it, start the course for free!

Unlock full course by purchasing a membership
Setting up your Text Editor/IDE
Setting up your Text Editor/IDE
The beautiful thing about working with web tech is that in the end all you are doing is editing text files, so you can use whatever program you are most comfortable in to do that.
However, if you don’t already have a strong preference I would strongly recommend checking out Visual Studio Code. It has excellent support for TypeScript and has IntelliSense to help you auto complete code, automatically import from the correct places, and will warn you in your editor if you have made some kind of type error (more on that later).
On top of that, it has a strong ecosystem of plugins/extensions that you can install to help build/manage your projects. Some of these plugins are official plugins provided by the likes of Angular and Ionic themselves, and there are also a ton of community plugins you can use.
Once you have installed VS Code, I highly recommend enabling the code command. To do this, you will need to press:
Cmd + Shift + PFrom within VS Code. This will launch the command palette which is also just a generally useful utility - you can search for all sorts of options here. In this case, we want to search for:
shellYou should see an option like this:
Shell Command: install 'code' command in PATH
Navigate to that option with the arrow keys, hit Enter and the code command will be added to your path. What this will allow you to do is run the code command from the terminal to open whatever your current working directory is in VS Code.
This is really useful, as it saves the pain of needing to:
- Open VS Code
- Click open
- Find the folder you want in the explorer
- Open it
Instead, you can easily jump into a new project like this:
ionic start my-app blank --type=angularcd my-appcode .
Technically, you could just run code my-app instead of changing into that directory first.
Recommended Extensions
As I just mentioned, one of the greatest things about VS Code is the healthy ecosystem of extensions. Some extensions in VS Code are nice to have, but some are almost required given how beneficial they are. In this section, we are going to focus on installing the extensions that I think you should always have installed for Ionic/Angular development. In the following section, we will look at a couple of additional optional extensions.
To install an extension, open VS Code and click the Extensions tab in the Activity Bar:

From here, you can search for the name of extensions and install them. Often, you will need to reload VS Code before an extension is enabled.
Angular Language Service
This one is critical for Angular applications. It adds things like:
- Auto completion
- Syntax highlighting for inline templates
- Diagnostic information
- …and more
Prettier - Code formatter
This one will auto format your code for you - things like breaking up lines that are too long, fixing indentation issues, using consistent quotes (double vs single), and so on. Basically, you can just focus on coding rather than making everything look nice, and then when you hit save everything will be formatted to a standard convention automatically.
ESLint
This is similar in concept to Prettier, but ESLint will enforce certain coding conventions rather than the formatting of your code. This is a good way to make sure you are conforming to conventions, as you will get red squiggly lines complaining when you don’t.
Optional Extensions
Now for some optional extensions - you don’t have to install these but I find them useful.
Ionic
You might be surprised to find this one in the optional section. This is a fantastic extension provided by the Ionic team that provides an easy way to configure your Ionic project, run builds, check for problems, all from within VS Code. The only reason I am listing this as optional is that it’s more of a quality-of-life improvement rather than something you can’t really get by without - we will be learning how to do all these things ourselves, but the plugin does make it easier.
Auto Close Tag
This is one I like because it will automatically add a matching closing tag for HTML tags whenever you add an opening one - this one is just a bit of a time saver.
Angular Inline Jumper
With Angular, we can either define our entire component (logic/template/styles) in one file, or we can split it out into three separate files. The approach advocated for in this course is single file components and we will discuss why that is a little later. In the end, either approach is fine and it isn’t that big of a deal.
However, if you do end up following the style of this course and using single file components, you might also want to consider installing this extension. It just makes quickly jumping around your component easier - especially if you are someone who likes to rely on the keyboard more than the mouse (full disclosure: I built this plugin).
Explore
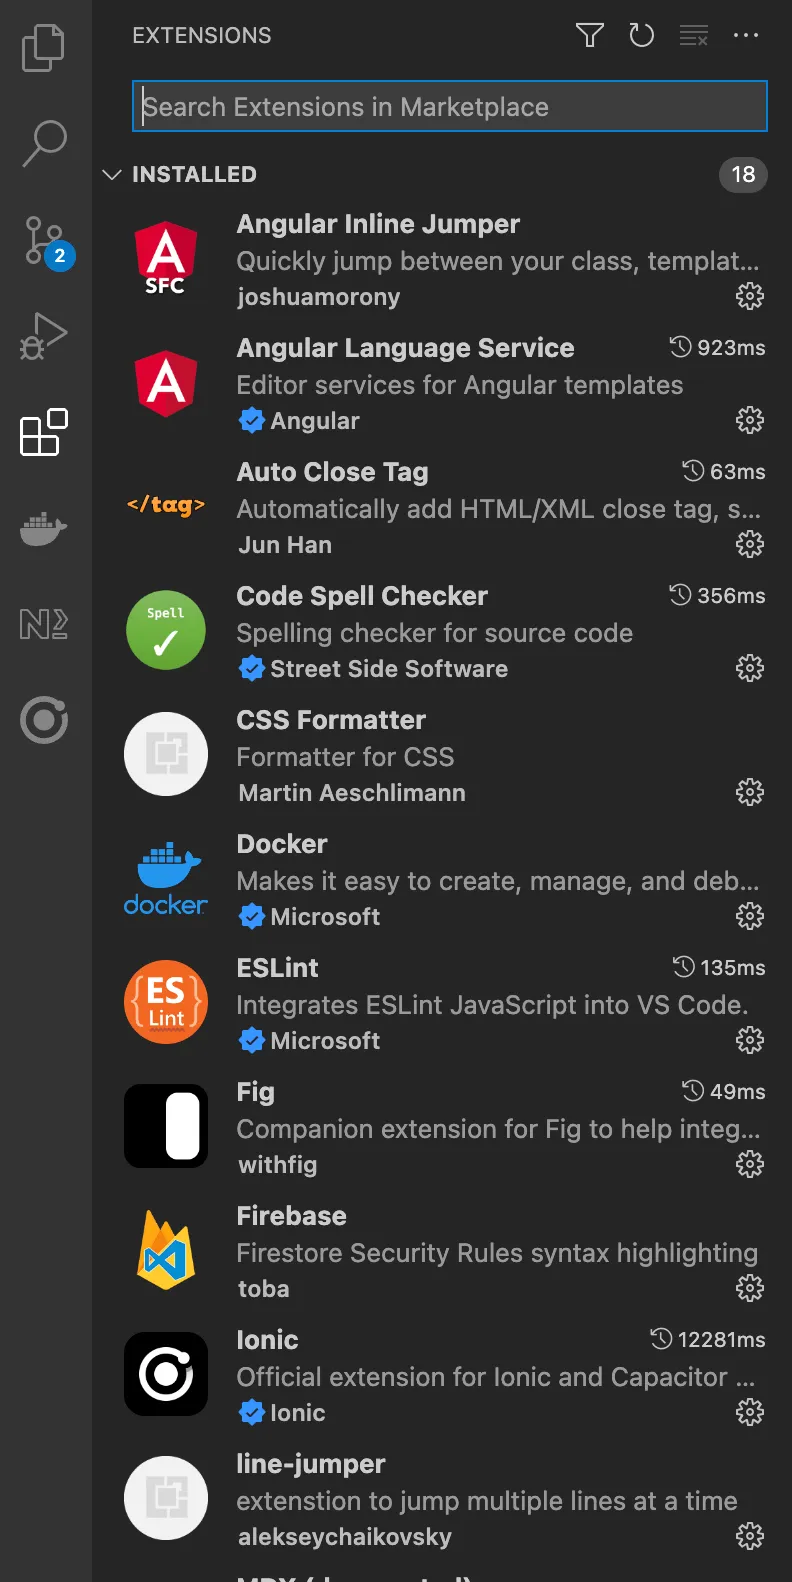
Your coding style and workflow preferences are unique to you. As you use VS Code I would encourage you to explore other popular extensions out there and see what you like! This is a full list of all of the extensions I have installed in VS Code at the time of writing this (keep in mind that many of these are not related to Angular development):
- Angular Inline Jumper
- Angular Language Service
- Auto Close Tag
- Code Spell Checker
- CSS Formatter
- Docker
- ESLint
- Fig
- Firebase
- Ionic
- line-jumper
- MDX
- Nx Console
- Peacock
- Prettier - Code formatter
- Prisma
- rust-analyzer
- Tailwind CSS IntelliSense