Existing member? Log in and continue learning

See if you like it, start the course for free!

Unlock full course by purchasing a membership
Creating an Advanced Local Capacitor Plugin
Creating an Advanced Local Capacitor Plugin
In the introduction to Capacitor module, we already looked at the basic outline of how to build a custom native plugin to access native functionality. If there isn’t already an official Capacitor API or a community plugin to access what you want, sometimes you might need to build the native integration yourself.
However, the plugin we created was very simple. All we did was call a method to display a native alert. In this lesson, we are going to take a look at something a little more advanced that involves two way communication - we send some kind of data across the native bridge, and we receive some kind of data back.
Get the Nth Photo
What we are going to try to do in this lesson is to get the “n”th latest photo
from the users gallery/photo library. If we supply 0 it should give us the
latest photo, if we supply 1 it should give us the second to last photo the
user has taken, and if we supply 20 it should give us the 21st last photo
taken.
We are going to follow the same basic process as in the basic module, but we will be utilising some more advanced code.
Adding Native Code for iOS
First, you will need to open Xcode:
npx cap open iosor
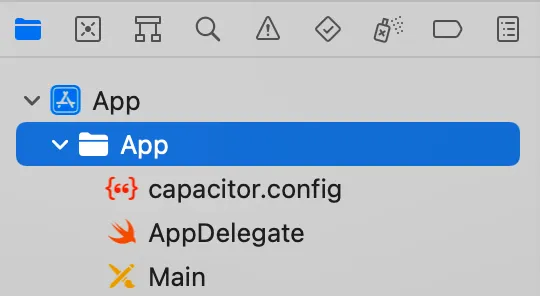
ionic cap open iosWithin XCode, you will need to expand App on the left, and then select the App target within that:

You can then right click it to create a new file - you should choose a
Swift file and name it something like NthPhotoPlugin.swift. You could then
add the following code to the file:
import Capacitorimport Photos
@objc(NthPhotoPlugin)public class NthPhotoPlugin: CAPPlugin, CAPBridgedPlugin {
    public let identifier = "NthPhotoPlugin"    public let jsName = "NthPhotoPlugin"    public let pluginMethods: [CAPPluginMethod] = [        CAPPluginMethod(name: "getNthPhoto", returnType: CAPPluginReturnPromise)    ]
    @objc func getNthPhoto(_ call: CAPPluginCall) {        let photoAt = Int(call.getString("photoAt") ?? "0") ?? 0        let photos = PHPhotoLibrary.authorizationStatus()        if photos == .notDetermined {            PHPhotoLibrary.requestAuthorization({status in                if status == .authorized{                    let base64String = self.getPhoto(photoAt: photoAt);                    call.resolve([                        "image": base64String                    ])                } else {                    call.reject("Not authorised to access Photos")                }            })        } else if photos == .authorized {            let base64String = self.getPhoto(photoAt: photoAt);            call.resolve([                "image": base64String            ])        } else {            call.reject("Something went wrong");        }
    }
    func getPhoto(photoAt: Int) -> String {        let fetchOptions = PHFetchOptions()        fetchOptions.sortDescriptors = [NSSortDescriptor(key: "creationDate", ascending: false)]        fetchOptions.fetchLimit = 100        let fetchResult = PHAsset.fetchAssets(with: .image, options: fetchOptions)        let image = self.getAssetThumbnail(asset: fetchResult.object(at: photoAt))        let imageData:Data =  image.pngData()!        return imageData.base64EncodedString()    }
    func getAssetThumbnail(asset: PHAsset) -> UIImage {        let manager = PHImageManager.default()        let option = PHImageRequestOptions()        var thumbnail = UIImage()        option.isSynchronous = true        manager.requestImage(for: asset, targetSize: CGSize(width: 500, height: 500), contentMode: .aspectFit, options: option, resultHandler: {(result, info)->Void in            thumbnail = result!        })        return thumbnail    }}
If you’re like me and don’t really know how to code in Swift/Java then this probably looks like a lot! The truth is that I was able to piece this together through some Google searches, as it is pretty easy to find code samples for common operations. Now, of course, we can also lean into AI for help as well.
Thanks for checking out the preview of this lesson!
You do not have the appropriate membership to view the full lesson. If you would like full access to this module you can view membership options (or log in if you are already have an appropriate membership).